Utilizing the Passenger Web App (PWA)
Over the last few weeks, we’ve seen increased interest in Limo Anywhere's Passenger Web App (PWA), so we thought this would be a good opportunity to take a deeper look. The PWA has a one-time setup fee of $199 and a recurring fee of $99 per month.
Benefits of the PWA
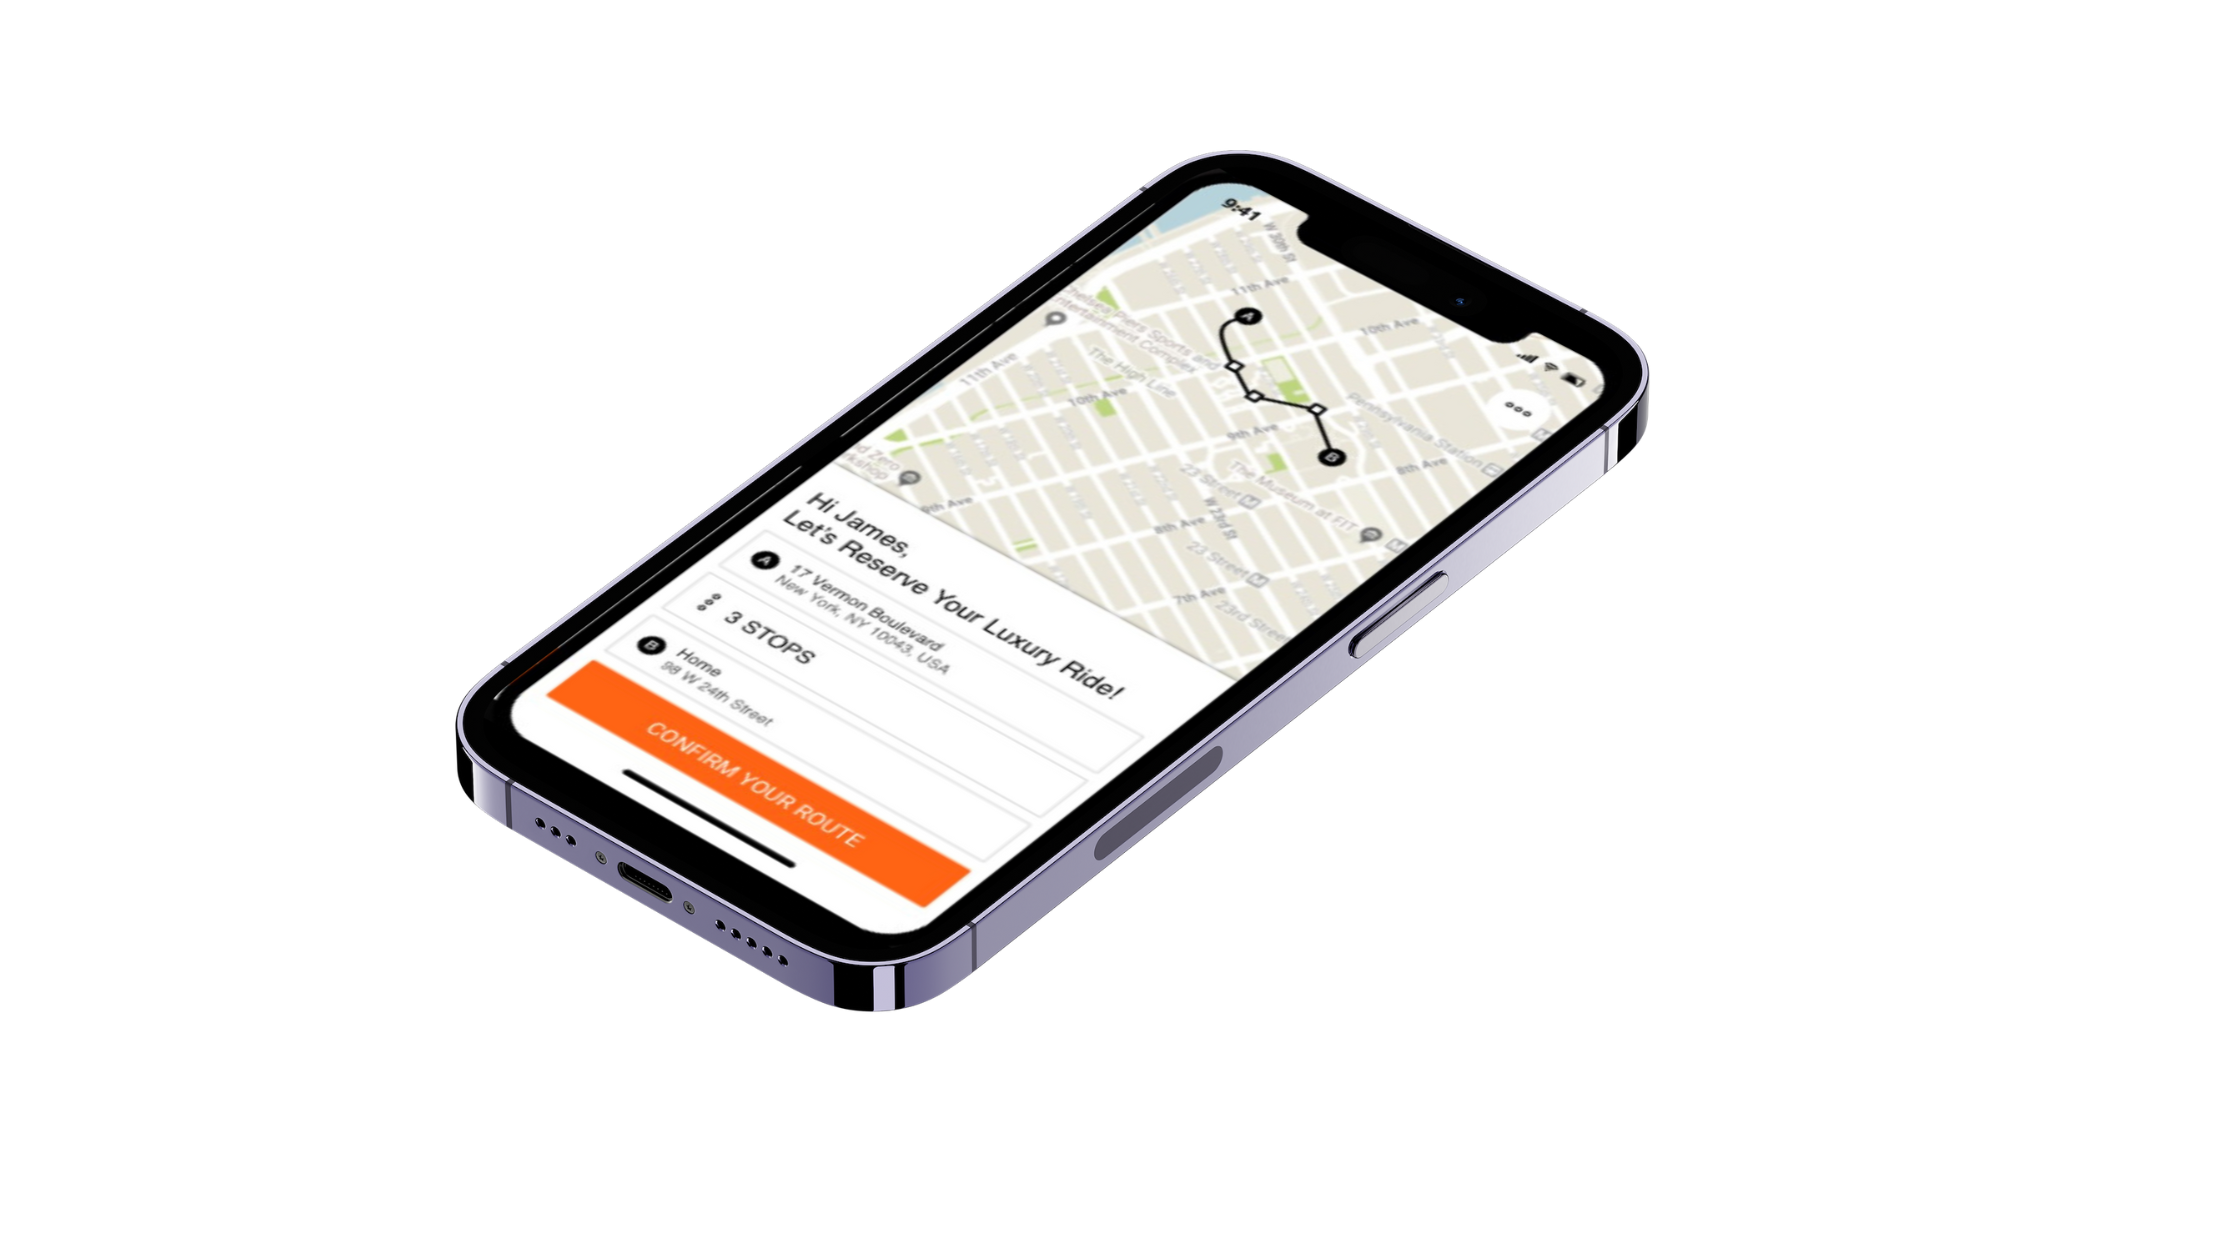
- The PWA provides operators with a mobile presence. With just a simple link, operators can enable their customers to download and book conveniently.
- The PWA facilitates seamless mobile booking, enabling customers to access rates and book on the go, no matter where their travels take them.
- Customers can enjoy comprehensive ride tracking features, including status updates, estimated time of arrival (ETA), driver and car information, and real-time GPS tracking within the app.
- The PWA allows billing or booking contacts to make bookings on behalf of their passengers or guests, enhancing convenience and flexibility.
- Powered by cutting-edge technology, the PWA offers numerous advantages, including improved conversion rates, heightened user engagement, offline functionality, faster performance, and easy installation.
Accessing Your PWA Setting in Limo Anywhere
- Click the ‘My Office’ icon in the Navigation Bar.
- Select the ‘Company Settings’ tab.
- Click the ‘Online Reservation’ button from the left-hand menu, then select the ‘PWA’ button.
- If applicable, select the appropriate alias you want to set up the PWA for.
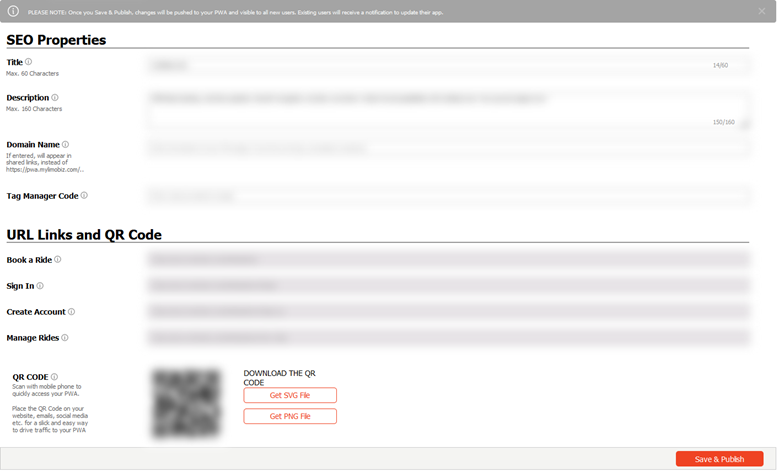
- Under the ‘Settings‘ tab, you will see a section ‘SEO Properties‘
- Complete the Title and Description
- (Optional) If applicable enter the domain name associated with your PWA page and enter your Google Tag Manager Code.
Understanding the PWA URL Links
There are four different links associated with your PWA available in the PWA Settings. You can utilize these on your website or they can be used in client communications that will direct your clients to specific sections of your PWA.
- Book a Ride: This URL link will direct your client to your PWA main page, where they can book a ride.
- Sign In: This URL link will direct your client to your PWA Sign In page, allowing them to sign into their account.
- Create Account: This URL link will direct your client to your PWA page for creating an account.
- Manage Rides: This URL link will direct your client to your PWA page where they can view their upcoming and past rides. Note: Clients need to be logged into their account to manage any past or upcoming rides.
Customizing Your PWA
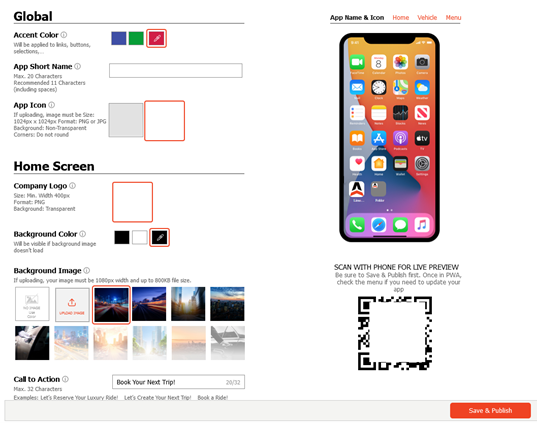
- Click the ‘Customization’ tab to access your company’s personalization settings.
- Choose your desired accent color. The accent color that you choose will be applied to links, buttons, and selections in your PWA. By default, your system includes blue and green, or you can add your own color either by selecting it from the slider or by entering the appropriate HEX code.
- Enter the desired short name for your PWA. We recommend up to 11 alphanumeric characters and spaces but you can enter a maximum of 20. The short name is the name of the PWA that will appear on the mobile device if installed.
- Upload your app icon. The app icon must be a JPG or non-transparent PNG and must be exactly 1024 pixels x 1024 pixels.
- Upload the logo that will appear on your PWA’s home screen. If you are uploading an image as your Company logo it must be a transparent PNG with a minimum width of 400 pixels.
- Choose a background color. If you do not use a Background Image or if your Background Image does not load then the Background Color will be shown.
- Choose or upload a background image. There are 10 images available in the system or you can choose to upload your own. If you select ‘No Image’ then your logo will be shown on the background color you chose in the step above.
- Choose your Call to Action. The Call to Action appears over the location selections on the Home Page. You can select one of the three examples in the system or create your own (max 32 characters).
- Click ‘Save & Publish’ when finished.
Once the PWA has been saved and published,you’re ready to share the URL Links with your clients.
If you're interested in setting up the PWA for your business, send an email to billing@limoanywhere.com requesting to add the PWA to your account. In your request, please include your Limo Anywhere company ID.
As always, if you have any questions, suggestions, concerns, or feedback, please don't hesitate to reach out. You can call us at 888-888-0302 x2 or send an email to Support@LimoAnywhere.com.
Recent Posts

A More Proactive Way to Manage Driver and Affiliate Compliance
Wednesday July 22, 2026