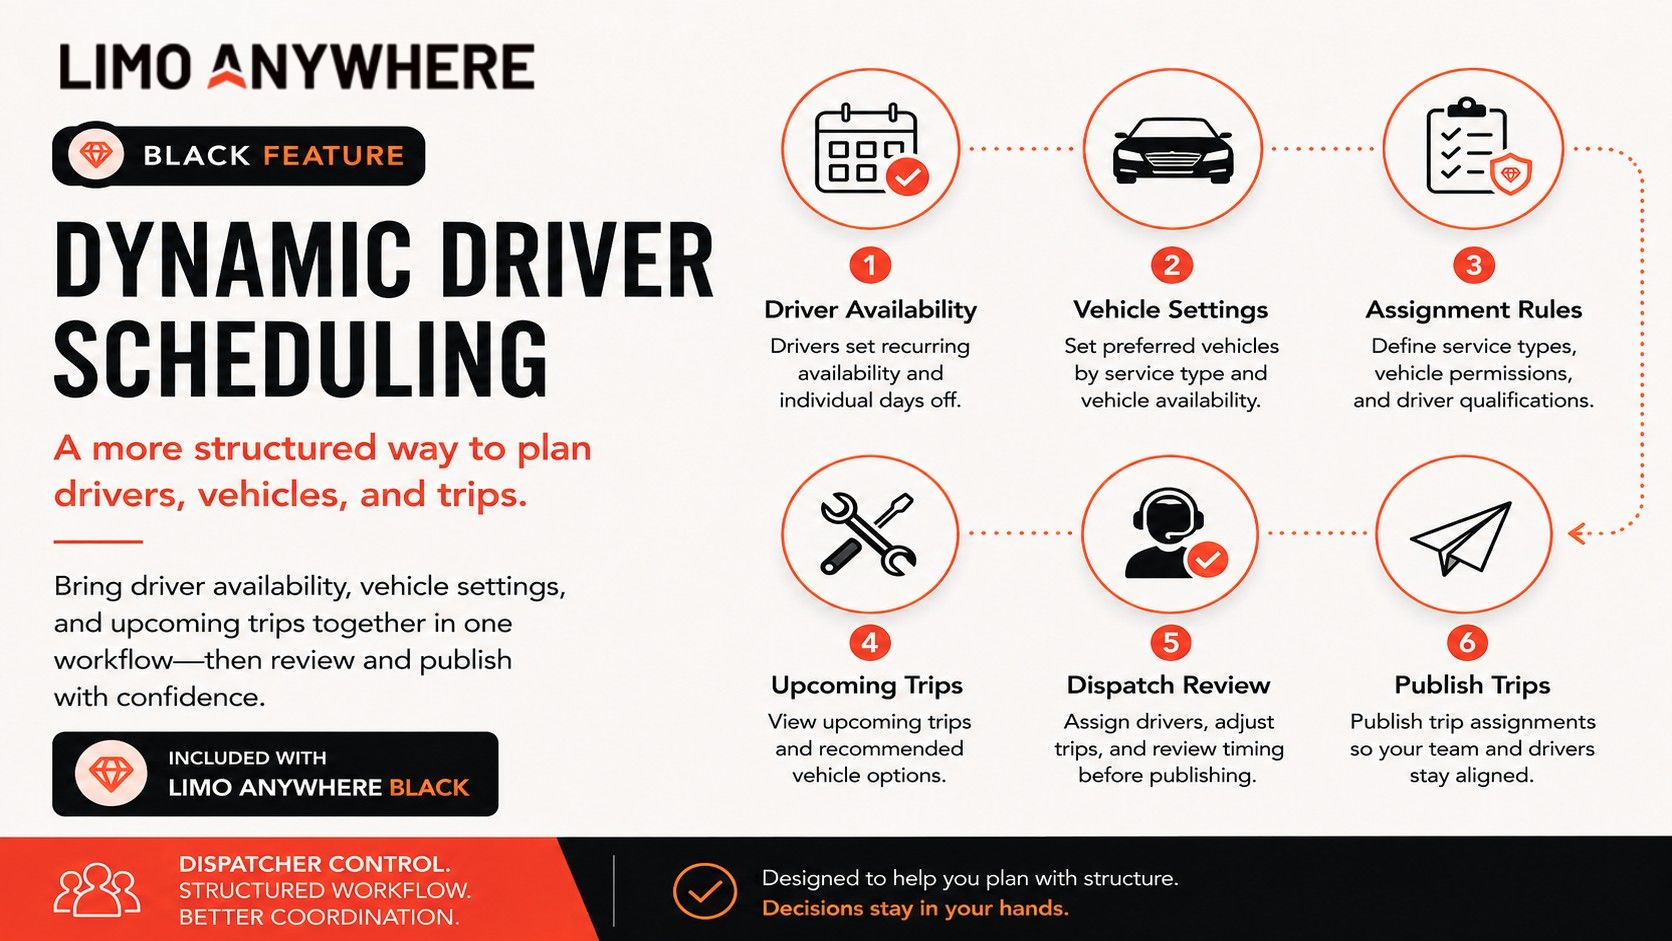
Simplifying Reservations with Custom Booking Portals
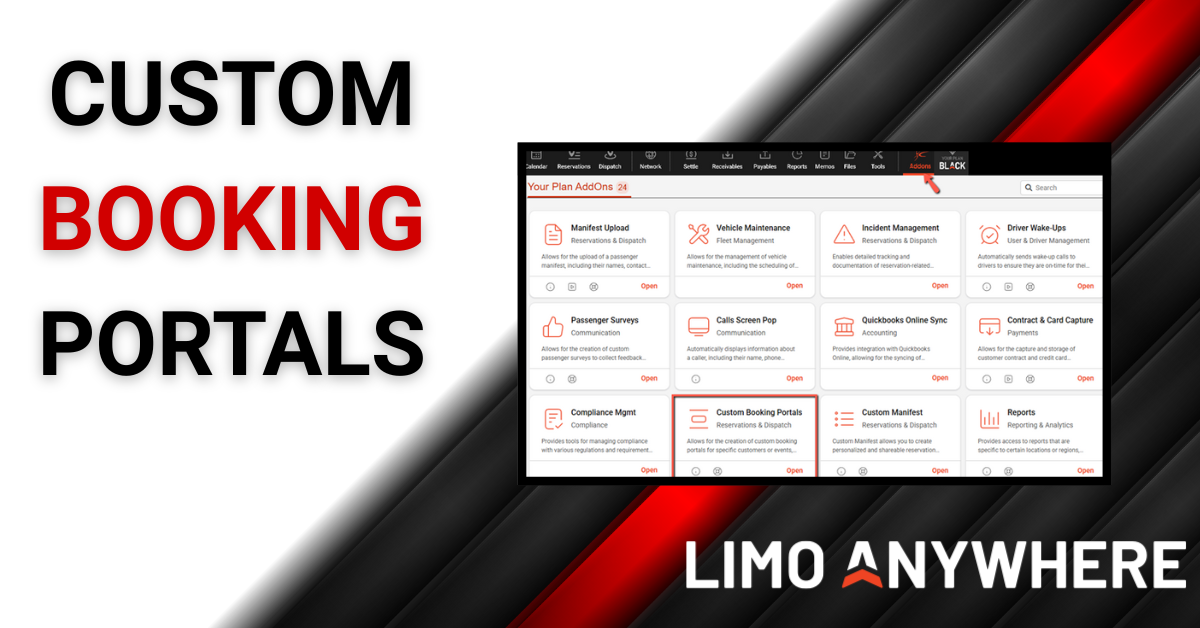
Custom booking portals in AddOns let you build a branded, self-service booking page for a specific client, group, or event. Clients book directly through their portal and those reservations flow straight into your Limo Anywhere system. This saves time, reduces errors, and gives you control over what services, vehicles, and rates they see, whether you are creating a dedicated portal for hotel guests, a corporate account with negotiated rates, or a special event where attendees need quick, easy access to book transfers.
Configuring a Custom Booking Portal
- Click the “Addons” icon in the top navigation bar.
- Select “Custom Booking Portals” from the list of available Addons.
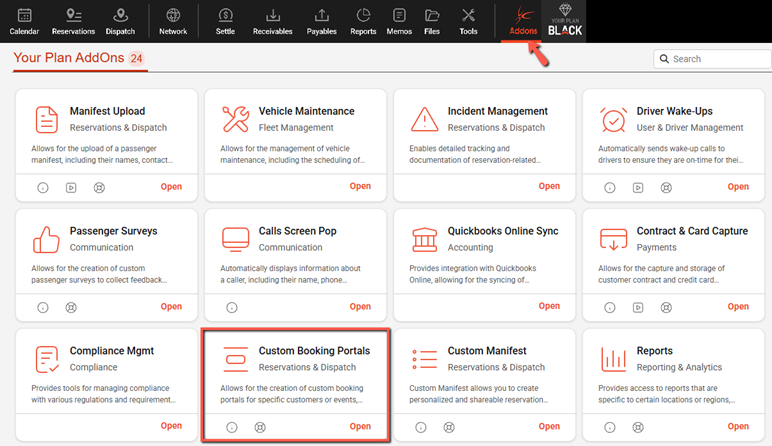
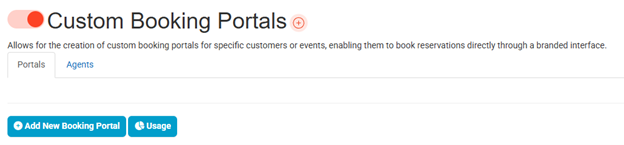
3. Click "Add New Booking Portal"
4. In the “Name” field enter a clear internal name such as “Hilton Downtown Guest Transfers” or “ABC Corp Executive Travel.”
5. Upload a “Logo” file and select a “Header Color” field to brand the portal.
6. Set the “Portal Active Start/End” fields if the portal is time-limited, or leave the end blank to keep it active indefinitely.
7. Use the “Minimum/Maximum Booking Date” and “Minimum Hours Before Booking” fields to control how far out and how soon bookings can be made.
8. Check or uncheck options depending on the client’s needs:
- “Use Portal for Leads and Auto-Quotes” to have requests flow in as quotes instead of confirmed trips.
- “Allow New Passenger Accounts” to let new riders create their own account at checkout.
- “Allow Multiple Passengers/Stops” to enable group or multi-stop bookings.
- “Allow Custom Pickup/Dropoff Addresses” to permit or restrict free-form addresses.
- “Prompt for Payment Details” or “Prompt for Separate Name on Credit Card” to collect payment info at booking.
9. In the “LimoAnywhere Room Field” select the correct PO/Client Reference # field if needed.
10. Add any “Intro Text” field, “Fixed Group Name” field, and select a “Default Status” field such as “Online and eFarm In” or “Unassigned” to determine how bookings will appear in your system.
11. Use the “Pick Up Time Tooltip,” “Welcome Instructions,” and “Footer Text” fields to add client-facing directions or disclaimers at the top or bottom of the portal.
12. Click the “Add Portal” button to save your updates.
Adding a Custom Booking Portal Agent
Once your portal has been created, you’ll want to make sure an Agent is added so the portal can accept and manage bookings properly.
- Select the "Agents" tab at the top of the screen.

2. Click “Add New Booking Agent” to open the agent setup screen.
3. Fill in the “First” and “Last” name fields for the agent.
4. Enter the agent’s “Email” address.
5. In the “Portal” field, select the portal you want the agent linked to (for example “Hilton Downtown Guest Transfers”).
6. In the “Passenger Types” field, choose how passengers will be entered into the system:
- “Free-Form Passengers” lets the agent manually enter passenger information for each booking.
- “Look-Up By Account Number” requires the agent to select an existing passenger by account number.
- “Both” allows either free-form entry or lookup by account number.
- “None” disables passenger entry entirely.
7. Pick a “Time Format” (12-hour or 24-hour).
8. Check “Prompt for Booking Contact” if you want the system to request a booking contact for each reservation.
9. Check “Address Names Only” if you want addresses restricted to saved names instead of free-form entries.
10. Click the “Add Agent and Continue to Add Accounts” button to save the agent.
After saving, you’ll land on the “Edit Custom Booking Portal Agent” screen. At the top of this page you’ll see the Portal Link and Portal iFrame Code. The link is what you send to your client for direct booking access, and the iFrame code lets you embed the portal into your own website if you prefer. The URL will typically start with your AddOns shortcode (for example https://[yourshortcode].mylimobiz.com/m/portal/...).
- (Optional) Enter an address in “Send Booking Email Notice To” if you want booking notifications sent automatically and add a “Send Booking Email Subject”
- (Optional) Check “Prompt for Custom Signage,” “Show Vehicle Image,” or “Require Billing Address” based on desired features for your booking portal.
- Customize the “Send Booking Email Body” using placeholders on the right to format your confirmation emails.
- Under “Account Numbers This Agent Can Select,” click “Add Account” to link the agent to specific accounts.
- Under “Payment Methods This Agent Can Select,” pick from the dropdown or click “Add Payment Method” to allow additional options.
- Under “Vehicle Types This Agent Can Select,” choose the allowed vehicle types, optionally add a “Vehicle Alias,” set the “Vehicle Order,” and click “Add Vehicle” to save it.
- When you’re finished, click “Update Agent” to save all changes.
Creating Specialty Rates for Your Custom Booking Portals
Once your booking portal and agent are set up, you can create rate sheets tailored to the clients who book through that portal. This is especially helpful if you want to offer negotiated or specialty pricing to certain groups, such as hotel guests or corporate accounts. After creating the appropriate rate sheets, you can configure Selection Factors so the system automatically applies the correct rates whenever a reservation is made through that specific portal
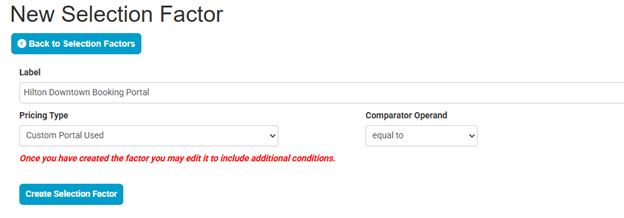

NOTE: Make sure that any factors controlling rate selection in Custom Booking Portals appear at the top of the list. The system evaluates Selection Factors in the order they appear, so placing your booking portal factor first ensures the correct rates populate before any other matching criteria.
For a step-by-step walkthrough on using Selection Factors to build dynamic pricing rules, see our blog: Creating Dynamic Pricing with Selection Factors in Lead Quote Close
Custom Booking Portals are available to users on the Plus and Black Limo Anywhere tiers. If you’re interested in learning more or want to sign up, reach out to Sales today at 972-701-8887 ext. 1 or email sales@limoanywhere.com.
Tell us how you’re currently using Custom Booking Portals in your operation. Share your experience in the Limo Anywhere Peer Support Group: https://www.facebook.com/groups/LimoAnywhere
Recent Posts
When Someone Searches “Car Service Near Me,” Will They Find You?
Wednesday July 29, 2026
A More Proactive Way to Manage Driver and Affiliate Compliance
Wednesday July 22, 2026