Utilizing Custom Statuses In Limo Anywhere
Limo Anywhere’s status mapping functionality allows your system to interpret the status a trip is in and enable certain system features to deploy (ex. scheduled messaging). By tailoring trip statuses to align with your company's workflow, mapping them effectively, and using intuitive color codes, you can streamline processes and improve visibility within Limo Anywhere. Let's explore how these practical steps can enhance your operation.
Customizing and Managing Trip Statuses
Trip statuses are essential indicators of each reservation's progress, ensuring both your team and clients stay informed. To customize statuses to fit your business needs:
- Adding, Editing, or Deactivating Statuses:
- Navigate to 'My Office' > 'Company Settings' > 'System Settings' > 'System Mapping'.
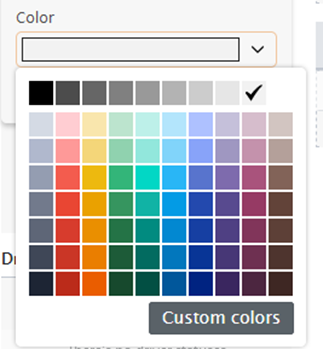
- To add a new status, click on the '+ Add Status' link, define its code, name, and select a color for visual identification on the calendar and dispatch screens.
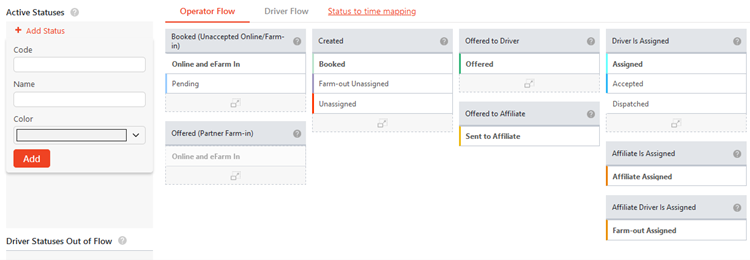
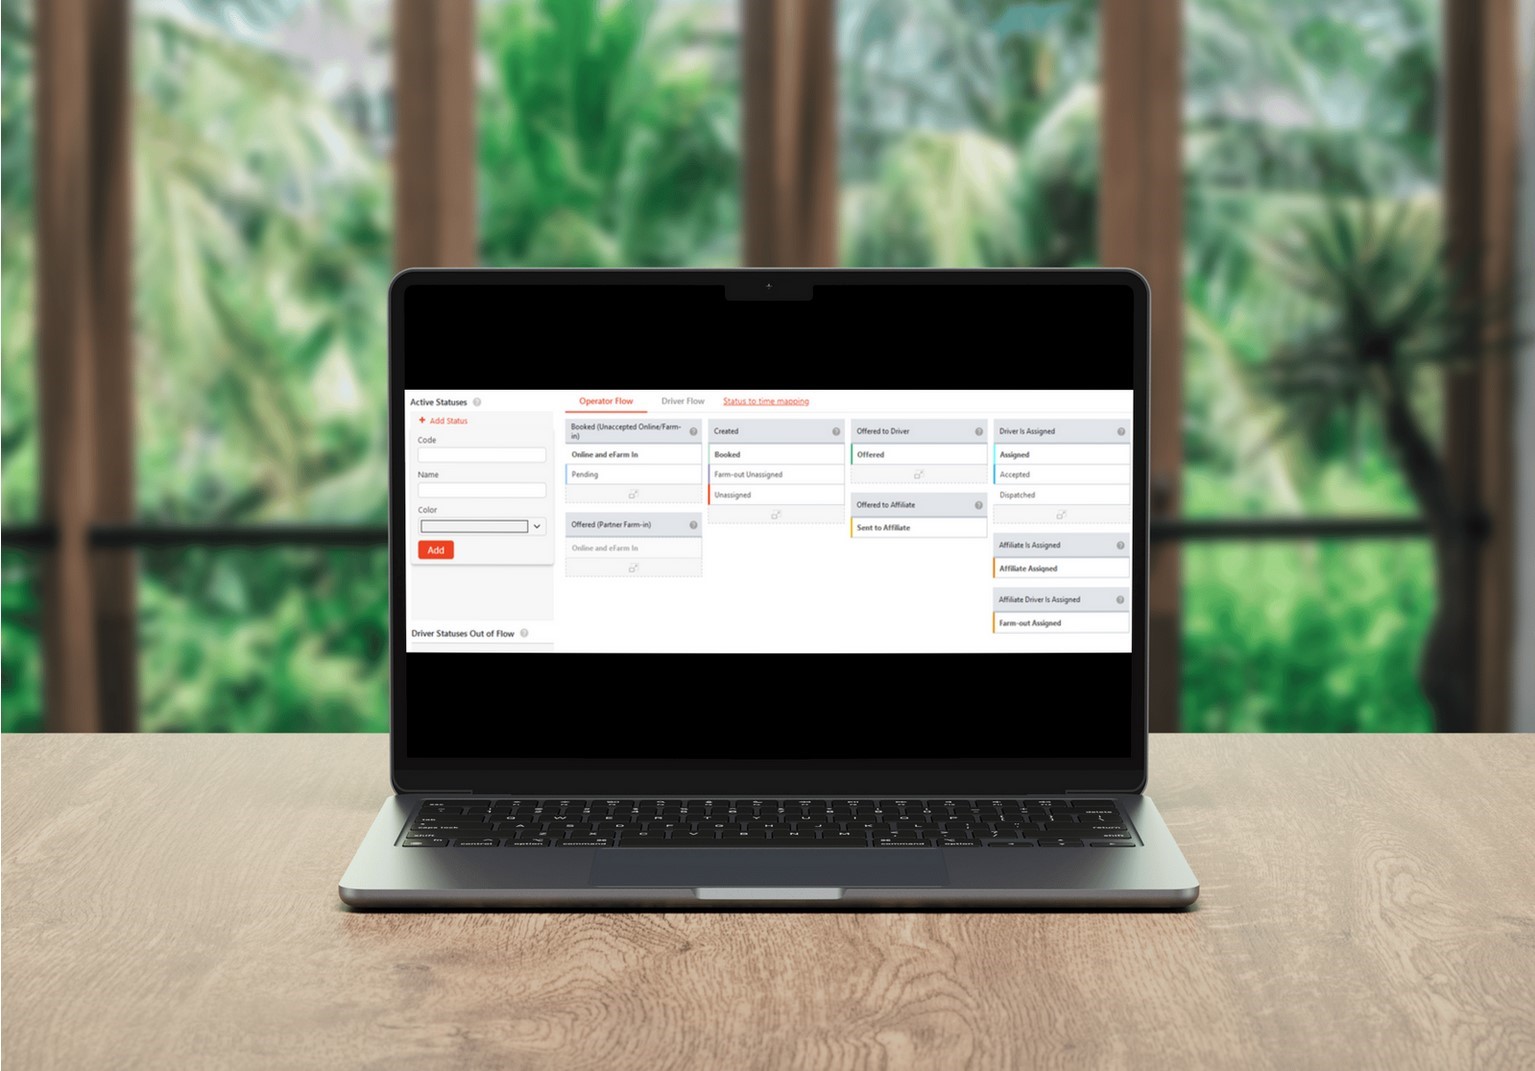
Mapping Statuses to States
Effective mapping of statuses to states ensures seamless flow within the operator and driver workflows. Here's how you can map statuses:
- Navigate to 'My Office' > 'Company Settings' > 'System Settings' > 'System Mapping'.
- Drag and drop statuses to correspond with the appropriate states within the Operator Flow.
a. Below are the explanations for ‘Operator Flow‘ and an example of mapping statuses is provided. The States marked ‘Optional‘ do not need to have statuses mapped to them.- Created – Status of an unassigned Trip.
- Booked (Unaccepted Online/Farm-in) – (Optional) Status of an unaccepted trip received via ORES or LANet.
- Offered (Partner Farm-in) – (Optional) Status of an unaccepted trip received from Third-Party Partner.
- Offered to Driver – Status of the trip when offered to a Driver.
- Offered to Affiliate – Status of the trip when offered to an Affiliate.
- Driver Is Assigned – Status of the trip when Driver accepts a trip.
- Affiliate Is Assigned – (Optional) Status of the trip when farmed-out to Affiliate.
- Affiliate Driver Is Assigned – (Optional) Status of the trip when Affiliate Driver has been assigned.
- Cancelled – Status of the trip when it has been cancelled.
- Late Cancelled – (Optional) Status of the trip when it has been cancelled close to the PU Date & Time.
- No Show – (Optional) Status of the trip when a passenger does not show for pickup.
- Repeat as appropriate for the Driver Flow (ex. You can add multiple statuses in the Driver Is En Route to Pickup status if you’d like your drivers to indicate that they’ve checked in before officially going On the Way for their trip).
a. Below are the explanations for ‘Operator Flow‘ and an example of mapping statuses is provided. The States marked ‘Optional‘ do not need to have statuses mapped to them.- Created – Status of an unassigned Trip.
- Booked (Unaccepted Online/Farm-in) – (Optional) Status of an unaccepted trip received via ORES or LANet.
- Offered (Partner Farm-in) – (Optional) Status of an unaccepted trip received from Third-Party Partner.
- Offered to Driver – Status of the trip when offered to a Driver.
- Offered to Affiliate – Status of the trip when offered to an Affiliate.
- Driver Is Assigned – Status of the trip when Driver accepts a trip.
- Affiliate Is Assigned – (Optional) Status of the trip when farmed-out to Affiliate.
- Affiliate Driver Is Assigned – (Optional) Status of the trip when Affiliate Driver has been assigned.
- Cancelled – Status of the trip when it has been cancelled.
- Late Cancelled – (Optional) Status of the trip when it has been cancelled close to the PU Date & Time.
- No Show – (Optional) Status of the trip when a passenger does not show for pickup.
Color Coding the Dispatch Grid
Utilize various shades or distinct colors to represent different trip types such as affiliate trips, partner farm-ins, or use color to easily call out specific statuses (ex. No Show).
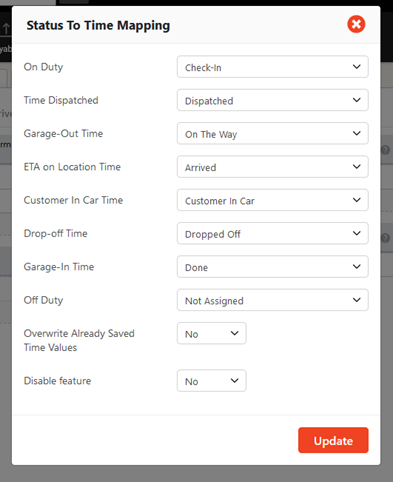
Setting Up Status to Time Mapping
Fine-tuning status-to-time mappings provides additional context and clarity within your system. Here's how to configure this feature:
- Select the 'Status to Time Mapping' link within the 'System Mapping' section.
- Choose the appropriate status from the dropdown list for corresponding time fields, ensuring accurate time tracking.
- Set preferences for overwriting saved time values as needed.
Recent Posts

How Black Car Operators Can Win More Corporate Accounts With Digital Marketing
Tuesday June 16, 2026
New Integrations and Workflow Improvements to Help Operators Move Faster
Monday June 8, 2026