Using Custom Forms

While there are a number of custom form templates available in the Limo Anywhere system that you can edit to fit your businesses exact needs, you can also use the Custom Forms Module to create your own custom forms.
Custom Forms allow you to use certain tags to dynamically populate different data related to your company in a form without having to manually enter important information. For example, the tag to pull the Confirmation Number of a reservation for use in a form is #TRIP_CONFNUM#.
Depending on your company’s experience of access to web development resources, you can either create forms using the HTML Editor or by using the WYSIWYG Rich Text Editor.
HTML Editor
WYSIWYG Editor
To view some of the tags available when creating new forms, you can find them by selecting either ‘Trip Tags’ (![]() ) or ‘Rate Tags’ (
) or ‘Rate Tags’ (![]() ) in the editor ribbon
) in the editor ribbon

Building Custom Forms
- Click on the ‘My Office’ icon in the toolbar.
- Select the ‘Custom Forms’ tab.
- There are two main types of Custom Forms that can be created:
- Trip Email & Print are forms sent from the Reservation screen such as Confirmations, Trip Sheets, and Payment Receipts.
- Invoice Email & Print are forms sent from the ‘Receivables’ section such as Invoices.
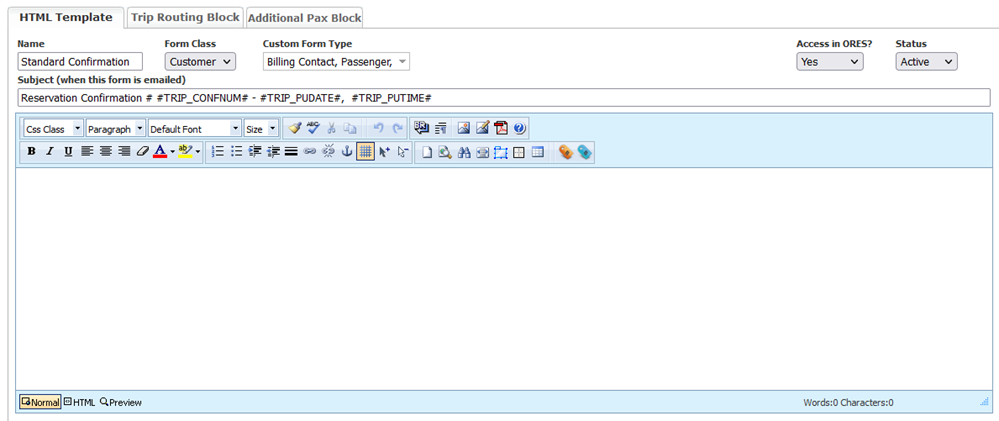
- Enter the ‘Name’ of the form.
- The ‘Form Class’ drop down list flags the form to only be sent to that type of recipient: ‘Customer’, ‘Driver’, or ‘Affiliate’.
- If you choose ‘Customer’ you can specify whether the form should go to the Billing Contact, Passenger, and/or Booking Contact.
- Enter the Subject. This field will populate the subject line of the email.
- It is important to have something here because many email hosts will block or categorize the email as SPAM when a subject line is blank.
- Click the ‘Save’ button to retain what has been entered to this point
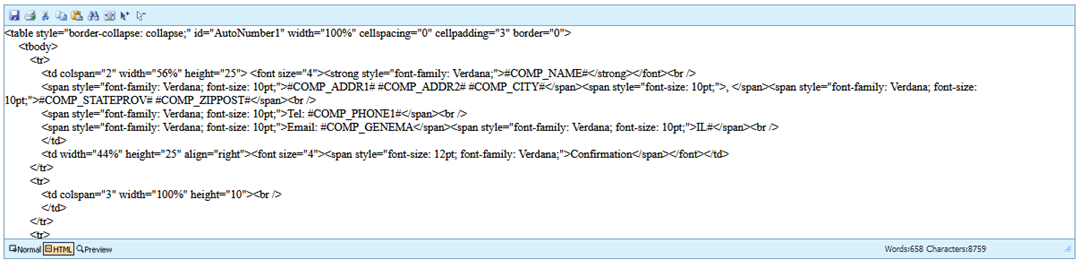
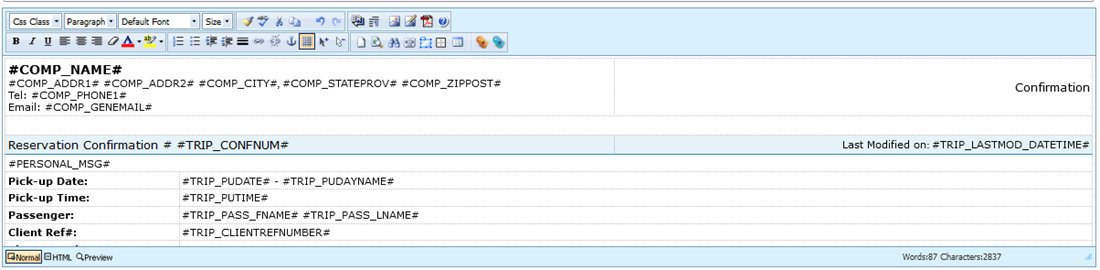
Adding Tables to Your Custom Forms
One of the best ways to build a Custom Form is by using tables. Tables help align and group the data and make the form more readable.
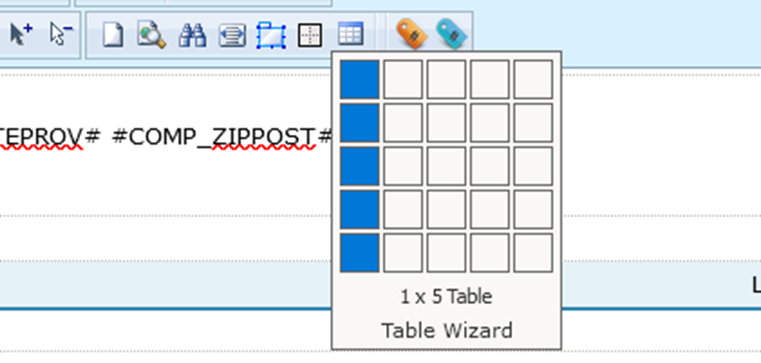
- Click the ‘Insert Table’ icon on the editor toolbar. This will open the Table Wizard window and insert a table into your form.
- Select 1 column for the first table. Estimate the number of rows based on the form being created.
- The best way to build the form is to place a table within the table for each section. Click to put the mouse cursor in the first row. Click the table icon again and this time we select 1 row and 3 columns.
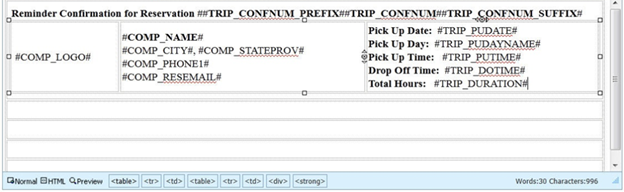
- Populate the row by typing the text and then clicking on the tag at the appropriate place. In this case the top of the form with a title line, the company info and some basic information about the trip such as confirmation number and pick-up day, date, and time. The screenshot below shows an example of how that information would appear on the form.
- You can insert additional tables and tags based on the Custom Form you are creating.
- You can also find additional Custom Form ideas or Templates that you can edit to fit your company at the following link.
Creating Custom Blocks
Using Custom Blocks is a good way to ensure that each time the information appears in a custom form it appears the same way. Custom Blocks also allow the customization of a display of information to appear as a given client would like it.
- Click on the ‘My Office’ icon in the toolbar.
- Select the ‘Custom Forms‘ tab.
- Open either the ‘Trip Email & Print’ or ‘Invoice Email & Print’ to find the form.
- The Custom Form will appear in the ‘Form Names’ list.
- Select the form that needs the blocks added to it.
- Click the ‘Edit’ button.
- Select the ‘Trip Routing Block’ tab.
- Customized Trip Routing Blocks may be used with a number of different forms. Because it is likely that for an address pick up point the same information would need to be communicated if the form was a Driver Trip Sheet or Customer Confirmation. Once these blocks have been built they can be copied and pasted into other forms.
- There are Trip Routing Block Templates for:
- Address Locations
- Airport Locations
- Seaport Locations
- FBO (Private Aviation) Locations
- POI (Points of Interest) Locations
Recent Posts

A More Proactive Way to Manage Driver and Affiliate Compliance
Wednesday July 22, 2026