Managing Airports in Limo Anywhere
Airport settings control how airport locations, pickup instructions, and airport-related fees function throughout the reservation process. Keeping these settings accurate supports consistent quoting, clearer chauffeur instructions, and more predictable airport operations.
Enabling Airports You Service
Limo Anywhere maintains a built-in list of commercial airports. These airports are inactive by default and must be enabled before they can be used on reservations.
To manage airports:
- Click the “My Office” icon.
- Navigate to the “Company Resources” tab.
- Select “Airports” from the left-hand menu.
- Click the “Show All” check box to view the entire list of available airports.
- Locate the airport you wish to enable and click the “EDIT AIRPORT” button.
Each airport includes a three-letter IATA code. These codes should not be modified, as they are used for system logic, reporting, and integrations.
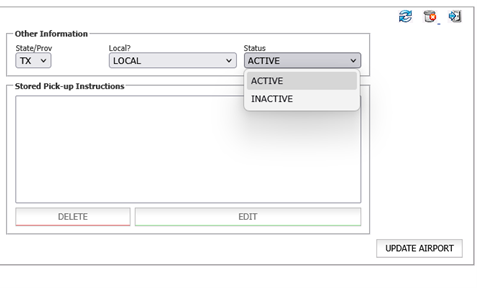
Click the “UPDATE AIRPORT” button to save your changes.
Adding an Airport Manually
If an airport does not appear in the default list, it can be added manually.
To add an airport:
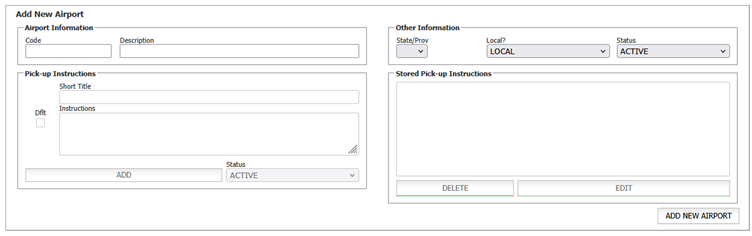
- From the “Airports” page, locate the Add New Airport section on the right side of the screen.
- Enter the airport’s three-letter IATA code in the “Code” field.
- Enter the full airport name in the “Description” field.
- Select the applicable State/Prov from the drop-down list.
- Set the “Local?” drop-down menu to LOCAL or NON-LOCAL, based on how the airport should be treated for pricing and service logic.
- Confirm the “Status” is set to ACTIVE.
- Click the “ADD NEW AIRPORT” button to save the airport.
NOTE: Accurate airport codes are important for consistency across reservations, reporting, and integrations.
Configuring Airport Pickup Instructions
Airport pickup instructions allow you to standardize how arrivals are handled by dispatchers and chauffeurs. Depending on your system settings, these instructions may appear on reservations and in confirmation communications.
To manage pickup instructions:
- Click the “My Office” icon.
- Navigate to the “Company Resources” tab.
- Select “Airports” from the left-hand menu.
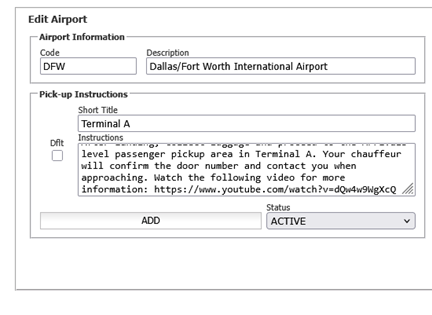
- Select an airport from the list and click the “EDIT AIRPORT” button.
Each airport can contain multiple pickup instruction entries. This is useful when supporting different terminals, arrival types, or service levels.
For each instruction:
- Enter a clear, descriptive name in the “Short Title” field.
- Add detailed pickup directions in the “Instructions” field.
- Set one instruction as Default by checking the “Dflt” box to apply automatically to new reservations.
- Confirm the status is ACTIVE.
- Click “ADD” to save updates.
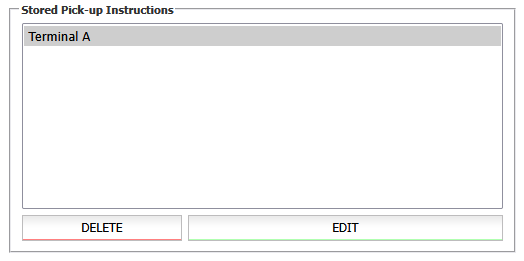
Once saved you will find a list of available instructions in the “Stored Pick-up Instructions” list.
Pickup instructions should be reviewed periodically to ensure they reflect current airport layouts, procedures, and operational expectations.
Reviewing Airport Pickup Fees
Airport-related fees, such as meet-and-greet or curbside pickup charges, are configured through company preferences and rate items.
To review or update pickup fees:
- Click the “My Office” icon.
- Go to “Company Settings” tab.
- Select “Company Preferences” from the left-hand menu.
- Open the “Reservations” section.
- Scroll to the “Pickup Fee” settings.

From here, you can assign rate items to airport pickups and update labels to match your service offerings. If a suitable rate item does not already exist, it must be created in System Rate Manager before it can be applied.
NOTE: Pickup fees apply system-wide. Changes should be reviewed carefully to ensure they align with your overall pricing structure.
Recent Posts

Digital Advertising That Drives Bookings: A Smarter Strategy for Chauffeur & Limo Operators
Monday February 9, 2026
Be Ready for Anything: Emergency Preparedness with Limo Anywhere
Friday January 30, 2026